


Close Up:
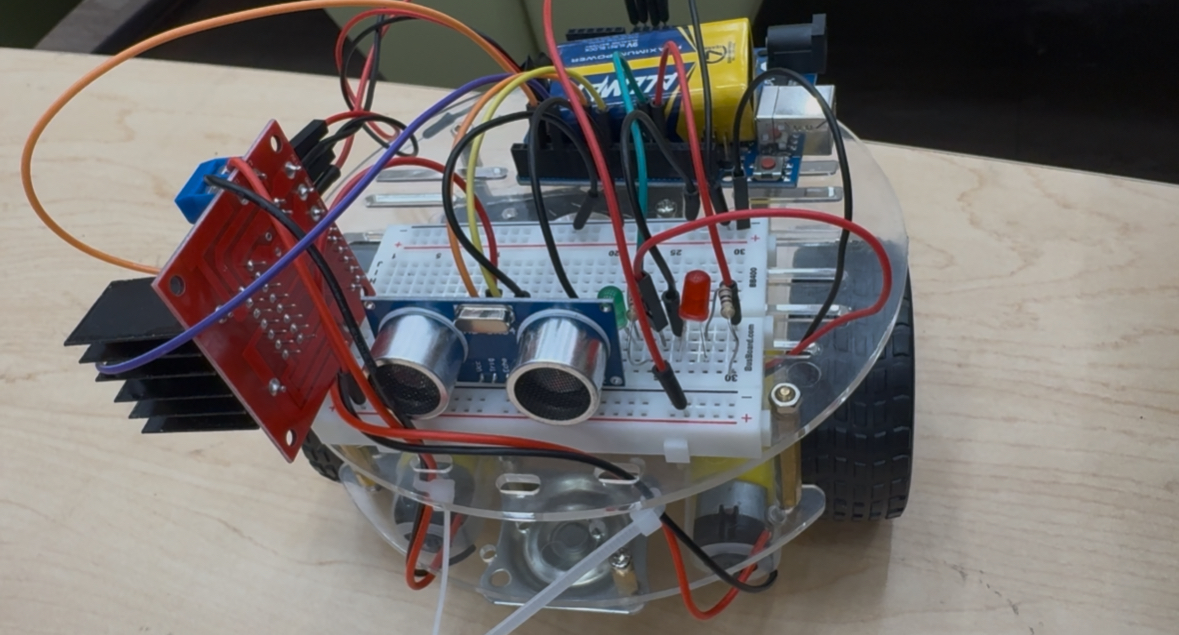
Bill of Materials (BOM)
Microcontroller & Control
- Arduino Uno (or compatible Arduino microcontroller)
- USB cable for programming and power
Sensors
- Ultrasonic distance sensor (HC-SR04)
- Jumper wires (male–male, male–female)
Actuation
- DC gear motors (2×)
- Motor driver module (L298N or equivalent dual H-bridge)
- Wheels (2×)
- Caster wheel (1×)
Power System
- Battery pack (9V or AA battery holder)
- Power switch
- Voltage regulator (if required)
Mechanical & Structural
- Acrylic or plastic robot chassis
- Motor mounting bracket
- Screws, nuts, and standoffs
Prototyping & Electronics
- Breadboard
- LEDs (status indicators)
- Resistors (assorted values)
Software
- Arduino IDE
- C++ embedded control code
const int trigPin = 11;
const int echoPin = 12;
const int greenLED = 9;
const int redLED = 10;
const int rightMotor = 5;
const int leftMotor = 6;
const int obstacleDistance = 90; // ~3 feet
void setup() {
pinMode(trigPin, OUTPUT);
pinMode(echoPin, INPUT);
pinMode(greenLED, OUTPUT);
pinMode(redLED, OUTPUT);
pinMode(rightMotor, OUTPUT);
pinMode(leftMotor, OUTPUT);
Serial.begin(9600); // Debugging
}
void loop() {
int distance = getDistance();
Serial.println(distance); // Debugging
if (distance > obstacleDistance) {
digitalWrite(greenLED, HIGH);
digitalWrite(redLED, LOW);
moveMotors(true);
} else {
digitalWrite(greenLED, LOW);
digitalWrite(redLED, HIGH);
moveMotors(false);
delay(1000);
avoidObstacle();
}
}
int getDistance() {
digitalWrite(trigPin, LOW);
delayMicroseconds(2);
digitalWrite(trigPin, HIGH);
delayMicroseconds(10);
digitalWrite(trigPin, LOW);
long duration = pulseIn(echoPin, HIGH);
int distance = duration * 0.034 / 2; // Convert to cm
return distance;
}
void moveMotors(bool forward) {
if (forward) {
digitalWrite(rightMotor, HIGH);
digitalWrite(leftMotor, HIGH);
} else {
digitalWrite(rightMotor, LOW);
digitalWrite(leftMotor, LOW);
}
}
void avoidObstacle() {
digitalWrite(rightMotor, HIGH);
digitalWrite(leftMotor, LOW); // Spin
delay(1500); // Adjust spin duration as needed
}